Trinal: Difference between revisions
RichouHunter (talk | contribs) Added hologram |
RichouHunter (talk | contribs) Added solution |
||
| Line 11: | Line 11: | ||
== Overview == | == Overview == | ||
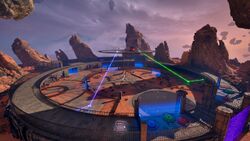
The large circular puzzle room is composed of a central area has a missing [[Fan]] leading to a large platform overhead, as well as three [[Blue door|Blue doors]] controlled by [[Pressure plate|Pressure plates]]. On the left and right are symetrical-looking area with a blue and green [[Emitter]] respectively, one [[Connector]] and a set of two doors connecting to the back area. In this back area are two [[Clone|Clones]] and a set of [[Pressure plate|Pressure plates]] that lead back to the central area. A [[Fan]] can propel the player on a ledge that goes all around the room, each side leading to a [[Pressure plate]] used to reveal six [[Receiver|Receivers]] that must all be powered to gain access to the underground room where the [[Progress Wheel]] lies. | |||
== Hints == | == Hints == | ||
{{ProgressiveHint|If you have trouble getting started|The first order of business is to free the two [[Clone]]s trapped in the back area. The one on the right is not too hard to reach. | |||
}}{{ProgressiveHint|If you can't reach the second [[Clone]]|Maybe the [[Connector]]s overhead can provide the elevation change you need to avoid intersecting lasers? | |||
}} | |||
{{TODO|Add more clues for the later parts of the puzzle.}} | |||
== Solution == | == Solution == | ||
{{Spoiler|2=solution| | |||
<gallery mode="slideshow"> | |||
File:Abyss - 19 - 1.jpg|Take the [[Connector]] and place it on the [[Pressure plate]] towards the blue [[Emitter]]. | |||
File:Abyss - 19 - 2.jpg|Take the [[Connector]] that is inside, connect the blue [[Emitter]] to the blue [[Receiver]] behind the [[Blue door]] and place it down on the nearby [[Pressure plate]]. | |||
File:Abyss - 19 - 3.jpg|Take the first [[Connector]] and bring it to the [[Pressure plate]] that leads to the green [[Emitter]]. | |||
File:Abyss - 19 - 4.jpg|Take the green [[Connector]] that is inside, connect it to the green [[Emitter]], the green [[Receiver]] nearby as well as the connector on the upper platform. Place it down on the [[Pressure plate]]. | |||
File:Abyss - 19 - 5.jpg|Pick up the [[Connector]] from the other [[Pressure plate]] and link the blue [[Connector]] across the room to the blue [[Receiver]] nearby. | |||
File:Abyss - 19 - 6.jpg|Access the back area and take control of the [[Clone]]. | |||
File:Abyss - 19 - 7.jpg|Activate the [[Switch]] to open the nearby [[Blue door]]. | |||
File:Abyss - 19 - 8.jpg|Take control of [[Byron]] again. | |||
File:Abyss - 19 - 9.jpg|Pick up the nearby blue [[Connector]], walk into the opposite room and link the green [[Connector]] from the upper platform to the green [[Receiver]] nearby. | |||
File:Abyss - 19 - 10.jpg|Access the back area and take control of the other [[Clone]]. | |||
File:Abyss - 19 - 11.jpg|Activate the [[Switch]] to open the nearby [[Blue door]]. | |||
File:Abyss - 19 - 12.jpg|Take the [[Fan]] blades and place them on one of the [[Pressure plate|Pressure plates]]. Position the other [[Clone]] on the second plate. | |||
File:Abyss - 19 - 13.jpg|Take the [[Connector]] into the back area. | |||
File:Abyss - 19 - 14.jpg|Place the [[Fan]] blades on the Fan that leads to the left side, where [[Byron]] is. | |||
File:Abyss - 19 - 15.jpg|Take the [[Connector]] and jump onto the [[Fan]]. | |||
File:Abyss - 19 - 16.jpg|Drop the [[Connector]] through the opening in the grate and take control of [[Byron]]. | |||
File:Abyss - 19 - 17.jpg|Take the [[Connector]] and bring it to the central room. Link the green [[Connector]] to the green [[Receiver]] that leads to the back room and place it down on the [[Pressure plate]]. | |||
File:Abyss - 19 - 18.jpg|Take the green [[Connector]] from the left room, link the blue [[Connector]] to the blue [[Receiver]] that leads to the back room. | |||
File:Abyss - 19 - 19.jpg|Walk into the back area and take control of the [[Clone]] that stayed on the [[Pressure plate]]. | |||
File:Abyss - 19 - 20.jpg|Position both [[Clone|Clones]] on the [[Pressure plate|Pressure plates]] and take control of [[Byron]]. | |||
File:Abyss - 19 - 21.jpg|Take the [[Fan]] blades and place them on the fan in the central room. | |||
File:Abyss - 19 - 22.jpg|Fly onto the upper platform. Take one of the [[Connector|Connectors]] there and link the blue [[Emitter]] to the blue [[Receiver]] that leads to the back area. | |||
File:Abyss - 19 - 23.jpg|Take the other [[Connector]] and do the same thing on the green side. | |||
File:Abyss - 19 - 24.jpg|Jump back down, take the blue [[Connector]] from the central room and place it on the [[Pressure plate]] that leads to the blue side. | |||
File:Abyss - 19 - 25.jpg|Take the blue [[Connector]] from inside the left room, bring it onto the upper platform and connect it to the red [[Emitter]]. | |||
File:Abyss - 19 - 26.jpg|Move the [[Connector]] in the central room to the [[Pressure plate]] on the green side. | |||
File:Abyss - 19 - 27.jpg|Take the green [[Connector]] from inside the right room, bring it to the upper platform and link the red [[Connector]] to the red [[Receiver]] by the [[Fan]] in the back area. | |||
File:Abyss - 19 - 28.jpg|Jump back down, and bring the [[Connector]] in the central area to the [https://www.youtube.com/watch?v=H4dGpz6cnHo back room]. | |||
File:Abyss - 19 - 29.jpg|Fly back up onto the upper platform and take control of one of the [[Clone|Clones]] from there. | |||
File:Abyss - 19 - 30.jpg|Place the [[Connector]] onto the [[Pressure plate]] the [[Clone]] left to keep the door open. | |||
File:Abyss - 19 - 31.jpg|Fetch the [[Fan]] blades from the central area, place them on the fan in the back area and jump up. | |||
File:Abyss - 19 - 32.jpg|From there, take control of the [[Clone]] below. | |||
File:Abyss - 19 - 33.jpg|Jump up with the second [[Clone]]. | |||
File:Abyss - 19 - 34.jpg|Walk all the way around to one of the [[Pressure plate|Pressure plates]] and take control of the other [[Clone]] from there. | |||
File:Abyss - 19 - 35.jpg|Walk all the way around to the other [[Pressure plate]] and take control of [[Byron]] on the upper platform. | |||
File:Abyss - 19 - 36.jpg|Take one of the [[Connector|Connectors]], connect it to the blue [[Emitter]] as well as both blue [[Receiver|Receivers]] by the entrance. Place it down on the outside of the platform, at around 1 o'clock. | |||
File:Abyss - 19 - 37.jpg|Take another [[Connector]], connect it to the red [[Emitter]] as well as both red [[Receiver|Receivers]] by the entrance. Place it down on the outside of the platform, right in the middle. | |||
File:Abyss - 19 - 38.jpg|Take another [[Connector]], connect it to the green [[Emitter]] as well as both green [[Receiver|Receivers]] by the entrance. Place it down on the outside of the platform, at around 11 o'clock. Jump down and finish the puzzle. | |||
</gallery> | |||
}} | |||
== Miscellaneous == | == Miscellaneous == | ||
| Line 21: | Line 69: | ||
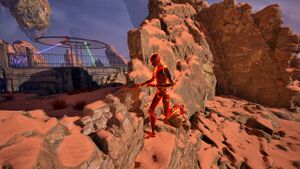
[[File:Abyss 19 - Nightmare.jpg|thumb|The red hologram, just right of the entrance.]] | [[File:Abyss 19 - Nightmare.jpg|thumb|The red hologram, just right of the entrance.]] | ||
Right of the entrance, a red hologram for the [[Abyss audio logs#Nightmare 11|Nightmare 11]] audio log can be found. | Right of the entrance, a red hologram for the [[Abyss audio logs#Nightmare 11|Nightmare 11]] audio log can be found. | ||
[[Category:TTP2 Into the Abyss Puzzles]] | [[Category:TTP2 Into the Abyss Puzzles]] | ||
[[Category:TTP2 Into the Abyss]] | [[Category:TTP2 Into the Abyss]] | ||
[[Category:Puzzles]] | [[Category:Puzzles]] | ||
Latest revision as of 13:31, 3 January 2025
| Trinal | |
|---|---|

| |
| Identifier: | Abyss-19 |
| Area: | Into the Abyss |
| Previous Puzzle: | Radiating Choice |
| Next Puzzle: | Interception |
Trinal is the nineteenth puzzle in Into the Abyss, part of the Road to Elysium expansion for The Talos Principle 2.
Puzzle Elements
Overview
The large circular puzzle room is composed of a central area has a missing Fan leading to a large platform overhead, as well as three Blue doors controlled by Pressure plates. On the left and right are symetrical-looking area with a blue and green Emitter respectively, one Connector and a set of two doors connecting to the back area. In this back area are two Clones and a set of Pressure plates that lead back to the central area. A Fan can propel the player on a ledge that goes all around the room, each side leading to a Pressure plate used to reveal six Receivers that must all be powered to gain access to the underground room where the Progress Wheel lies.
Hints
If you have trouble getting started:
If you can't reach the second Clone:
TODO
Solution
Miscellaneous
Nightmare hologram

Right of the entrance, a red hologram for the Nightmare 11 audio log can be found.


