High Plain: Difference between revisions
Appearance
m categories |
m Added easter egg locations |
||
| (19 intermediate revisions by 5 users not shown) | |||
| Line 1: | Line 1: | ||
{{Infobox Area | |||
|shortname = West 3 | |||
|areatype = Regular | |||
|previous = [[Anthropic Hills]] | |||
|next = [[Megastructure Interior - West]] | |||
}}The '''High Plain''', also commonly known as '''West 3''', is the twelfth and final regular puzzle area that the player visits. | |||
This area is described as a high-altitude plateau in the island's western mountain range. | |||
[[File:Westhighlands3.png|thumb]] | [[File:Westhighlands3.png|thumb]] | ||
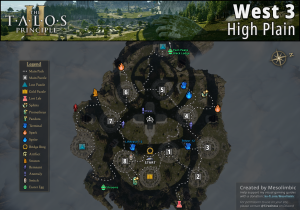
[[File:High Plain Map (West 3).png|thumb|Detailed map of the area]] | |||
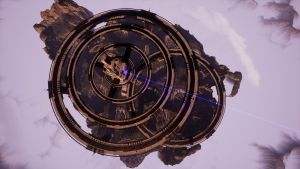
[[File:West-3 Aerial.jpg|thumb|An aerial view of the area]] | [[File:West-3 Aerial.jpg|thumb|An aerial view of the area]] | ||
The surrounding region often has restricted visibility due to fog. | The surrounding region often has restricted visibility due to fog. | ||
== Puzzles == | |||
=== Main Puzzles === | |||
# [[From Within]] | |||
# [[Chicken Flight]] | |||
# [[Precision]] | |||
# [[Duality]] | |||
# [[Rerouting]] | |||
# [[Mobile Instruments]] | |||
# [[Gateway Switch]] | |||
# [[Photon Sail]] | |||
=== Lost Puzzles === | |||
* [[Alternator]] | |||
* [[Hexahedral Stacking]] | |||
=== Gold Puzzle === | |||
* [[Windstream]] | |||
== Lost Lab == | |||
The lost laboratory is located {{TODO}} | |||
[[File:West 3 - Lost Lab - Interior.jpg|thumb|Scale model of the [[Megastructure]].]] | |||
It features a scale model of the [[Megastructure]]. | |||
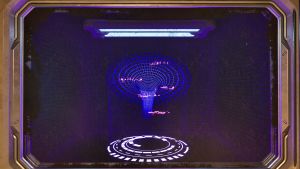
[[File:W3LostLabDisplay.jpg|none|thumb|Lost lab - Projection of a gravity well.]] | |||
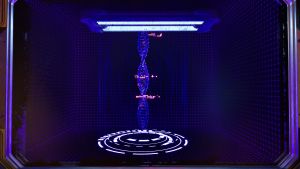
[[File:W3LostLabDisplay2.jpg|none|thumb|Lost lab - Projection of a double helix.]] | |||
== Tetromino bridge == | |||
{{Spoiler| | |||
<gallery> | |||
File:West 3 - Tetromino Bridge - 1.jpg|The first section of the bridge. | |||
File:West 3 - Tetromino Bridge - 2.jpg|The second section of the bridge. | |||
</gallery> | |||
|solution}} | |||
== Star monuments == | |||
=== Prometheus monument === | |||
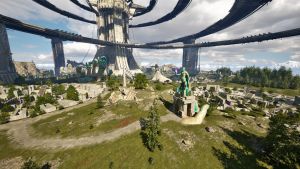
[[File:West 3 - Prometheus Monument.jpg|none|thumb|Location of the Prometheus Monument, behind puzzle 8, close to the rapid transport.]] | |||
'''Sprite route:''' | |||
{{Spoiler| | |||
<gallery mode="slideshow"> | |||
File:West 3 - Prometheus sprite location 1.jpg|Initial position: Behind [[Duality|puzzle 4]], climb onto the tip of the finger. | |||
File:West 3 - Prometheus sprite location 2.jpg|In front of [[Rerouting|puzzle 5]]. | |||
File:West 3 - Prometheus sprite location 3.jpg|On the way to [[Mobile Instruments|puzzle 6]]. | |||
File:West 3 - Prometheus sprite location 4.jpg|Inside [[Mobile Instruments|puzzle 6]], use the hexahedron. | |||
File:West 3 - Prometheus sprite location 5.jpg|on the way to [[Gateway Switch|puzzle 7]]. | |||
File:West 3 - Prometheus sprite location 6.jpg|on the way to [[Photon Sail|puzzle 8]]. | |||
File:West 3 - Prometheus sprite location 7.jpg|outside [[Photon Sail|puzzle 8]]. | |||
File:West 3 - Prometheus sprite location 8.jpg|on the other side of [[Photon Sail|puzzle 8]]. | |||
File:West 3 - Prometheus sprite location 9.jpg|Final position: in front of the prometheus monument. | |||
</gallery> | |||
|sprite route}} | |||
'''Quote''' | |||
''{{TODO}}'' | |||
=== Sphinx monument === | |||
'''Solution''' | |||
<div class="mw-collapsible mw-collapsed">{{TODO}}</div> | |||
'''Quote''' | |||
''{{TODO}}'' | |||
== Prometheus Sparks == | |||
The first Prometheus Spark can be found {{TODO}} | |||
The second Prometheus Spark can be found {{TODO}} | |||
== Documents and Audio Logs == | |||
=== AHANIA-1 === | |||
* [[From_Cornelius]] | |||
* [[NoemaProject13]] | |||
=== AHANIA-2 === | |||
* [[motherhood]] | |||
* [[From_Spugna]] | |||
* [[From_Hypatia]] | |||
=== AHANIA_EXT-1 === | |||
* [[Jurassic Justice]] | |||
* [[Expansion]] | |||
* [[Atlas_3]] | |||
=== AHANIA_EXT-2 === | |||
* [[Trevor_End]] | |||
* [[From_Triclinius]] | |||
* [[Sarabhai]] | |||
* [[Trevor's audio logs#Trev 012|Trevor_12]] | |||
=== E2-05 === | |||
* [[Lifthrasir's audio logs#Lifthrasir 12|Lifthrasir_12]] | |||
=== Straton of Stageira === | |||
* [[Straton's audio logs#Straton 12|Straton 12]]<br /> | |||
== Ancient Human Artifacts == | |||
{{TODO} | |||
== Anomaly == | |||
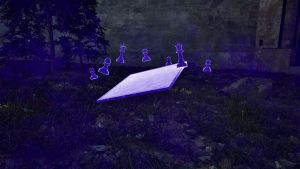
{{Spoiler|[[File:W3Anomaly.jpg|Chess board. Behind the central tower.|none|thumb]]|object and location}} | |||
== Easter Eggs == | |||
{{TODO}} | |||
[[Category:Areas]] | |||
[[Category:TTP2 Areas]] | [[Category:TTP2 Areas]] | ||
[[Category: | [[Category:TTP2]] | ||
Latest revision as of 18:18, 11 March 2024
| High Plain | |
|---|---|
| Short name: | West 3 |
| Area Type: | Regular |
| Previous Story Area: | Anthropic Hills |
| Next Story Area: | Megastructure Interior - West |
The High Plain, also commonly known as West 3, is the twelfth and final regular puzzle area that the player visits.
This area is described as a high-altitude plateau in the island's western mountain range.
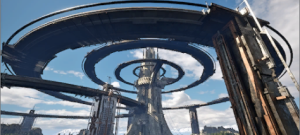
The surrounding region often has restricted visibility due to fog.
Puzzles
Main Puzzles
- From Within
- Chicken Flight
- Precision
- Duality
- Rerouting
- Mobile Instruments
- Gateway Switch
- Photon Sail
Lost Puzzles
Gold Puzzle
Lost Lab
The lost laboratory is located TODO

It features a scale model of the Megastructure.
Tetromino bridge
[ solution ]
Star monuments
Prometheus monument
Sprite route:
[ sprite route ]
Quote
TODO
Sphinx monument
Solution
TODO
Quote
TODO
Prometheus Sparks
The first Prometheus Spark can be found TODO
The second Prometheus Spark can be found TODO
Documents and Audio Logs
AHANIA-1
AHANIA-2
AHANIA_EXT-1
AHANIA_EXT-2
E2-05
Straton of Stageira
Ancient Human Artifacts
{{TODO}
Anomaly
[ object and location ]
Easter Eggs
TODO


