Uncategorized files
Showing below up to 50 results in range #1,751 to #1,800.
-
 West 1 - Gold Solution - 12.jpg 1,920 × 1,080; 700 KB
-
 West 1 - Gold Solution - 2.jpg 1,920 × 1,080; 773 KB
-
 West 1 - Gold Solution - 3.jpg 1,920 × 1,080; 752 KB
-
 West 1 - Gold Solution - 4.jpg 1,920 × 1,080; 726 KB
-
 West 1 - Gold Solution - 5.jpg 1,920 × 1,080; 644 KB
-
 West 1 - Gold Solution - 6.jpg 1,920 × 1,080; 722 KB
-
 West 1 - Gold Solution - 7.jpg 1,920 × 1,080; 762 KB
-
 West 1 - Gold Solution - 8.jpg 1,920 × 1,080; 815 KB
-
 West 1 - Gold Solution - 9.jpg 1,920 × 1,080; 679 KB
-
 West 1 - Sphinx Star.jpg 3,840 × 2,160; 2.49 MB
-
 West 1 - Tetromino Bridge (solution).jpg 3,840 × 2,160; 3.72 MB
-
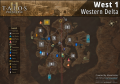 West 1 - Western Delta Map.png 1,920 × 1,344; 4.12 MB
-
 West 1 - Western Delta Map (newest).png 1,920 × 1,344; 4.12 MB
-
 West 1 Lab Entrance.jpg 3,840 × 2,160; 4.16 MB
-
 West 2-1.jpg 3,840 × 2,160; 3.05 MB
-
 West 2-2.jpg 3,840 × 2,160; 3.47 MB
-
 West 2-3.jpg 3,840 × 2,160; 2.68 MB
-
 West 2-4.jpg 3,840 × 2,160; 2.71 MB
-
 West 2-5.jpg 3,840 × 2,160; 3.42 MB
-
 West 2-6.jpg 3,840 × 2,160; 3.07 MB
-
 West 2-7.jpg 3,840 × 2,160; 2.74 MB
-
 West 2-8.jpg 3,840 × 2,160; 2.16 MB
-
 West 2-Gold.jpg 3,840 × 2,160; 3.09 MB
-
 West 2-Lost1.jpg 3,840 × 2,160; 2.92 MB
-
 West 2-Lost2.jpg 3,840 × 2,160; 3.1 MB
-
 West 2 - Anthropic Hills Map.png 1,920 × 1,344; 3.85 MB
-
 West 2 - Anthropic Hills Map (newest).png 1,920 × 1,344; 3.87 MB
-
 West 2 - Gold - Wide Shot.jpg 3,840 × 2,160; 1.41 MB
-
 West 2 - Gold Solution - 1.jpg 1,920 × 1,080; 931 KB
-
 West 2 - Gold Solution - 2.jpg 1,920 × 1,080; 793 KB
-
 West 2 - Gold Solution - 3.jpg 1,920 × 1,080; 885 KB
-
 West 2 - Gold Solution - 4.jpg 1,920 × 1,080; 895 KB
-
 West 2 - Gold Solution - 5.jpg 1,920 × 1,080; 830 KB
-
 West 2 - Gold Solution - 6.jpg 1,920 × 1,080; 808 KB
-
 West 2 - Gold Solution - 7.jpg 1,920 × 1,080; 866 KB
-
 West 2 - Gold Solution - 8.jpg 1,920 × 1,080; 1,000 KB
-
 West 2 - Gold Solution - 9.jpg 1,920 × 1,080; 865 KB
-
 West 2 - Gold Solution 2 - 1.jpg 1,920 × 1,080; 813 KB
-
 West 2 - Gold Solution 2 - 2.jpg 1,920 × 1,080; 748 KB
-
 West 2 - Gold Solution 2 - 3.jpg 1,920 × 1,080; 928 KB
-
 West 2 - Gold Solution 2 - 4.jpg 1,920 × 1,080; 688 KB
-
 West 2 - Gold Solution 2 - 5.jpg 1,920 × 1,080; 732 KB
-
 West 2 - Gold Solution 2 - 6.jpg 1,920 × 1,080; 708 KB
-
 West 2 - Gold Solution 2 - 7.jpg 1,920 × 1,080; 866 KB
-
 West 2 - Gold Solution 2 - 8.jpg 1,920 × 1,080; 972 KB
-
 West 2 - Lost 2 Wide Shot.jpg 3,840 × 2,160; 1.65 MB
-
 West 2 - Lost Lab - Somnodrome.jpg 3,840 × 2,160; 1.77 MB
-
 West 2 - Lost Lab Experiment.jpg 3,840 × 2,160; 1.28 MB
-
 West 2 - Tetromino Bridge 1.jpg 3,840 × 2,160; 1.63 MB
-
 West 2 - Tetromino Bridge 2.jpg 3,840 × 2,160; 1.84 MB


.jpg)

.png)


.png)


