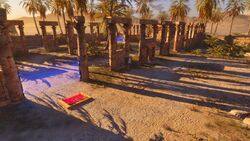
Me, Myself and Our Two Jammers: Difference between revisions
Appearance
Tearphones (talk | contribs) Added an image placeholder |
Tearphones (talk | contribs) Added a couple of hints |
||
| Line 1: | Line 1: | ||
{{Infobox TTP1 Puzzle | |||
|image=Me, Myself and Our Two Jammers.jpg | |image=Me, Myself and Our Two Jammers.jpg | ||
|area=[[B5]] | |area=[[B5]] | ||
|land=[[Land of Death]] | |land=[[Land of Death]] | ||
|reward={{Sigil|Red|L|link=Sigil#Red}} | |reward={{Sigil|Red|L|link=Sigil#Red}} | ||
}}'''Me, Myself and Our Two Jammers''' is a puzzle in World B5 of [[The Talos Principle]]. | }} | ||
'''Me, Myself and Our Two Jammers''' is a puzzle in World B5 of [[The Talos Principle]]. | |||
== Puzzle elements == | == Puzzle elements == | ||
| Line 12: | Line 14: | ||
== Hints == | == Hints == | ||
{{ProgressiveHint|If you're having trouble getting started|Note that there is only one jammer in the level. The recorded version of the user can use their own jammer.}} | |||
{{ProgressiveHint|If you feel short by one step|Note that you have to do two recording sessions. During the second recording session, make full use of all the available equipment and yourself.}} | |||
== Solution == | == Solution == | ||
Latest revision as of 11:20, 28 April 2025
| Me, Myself and Our Two Jammers | |
|---|---|

| |
| Area: | B5 |
| Land: | Land of Death |
| Reward: | |
Me, Myself and Our Two Jammers is a puzzle in World B5 of The Talos Principle.
Puzzle elements
- No puzzle elements selected. Please edit this list.
Overview
Hints
If you're having trouble getting started:
[ hint ]
Note that there is only one jammer in the level. The recorded version of the user can use their own jammer.
If you feel short by one step:
[ hint ]
Note that you have to do two recording sessions. During the second recording session, make full use of all the available equipment and yourself.
