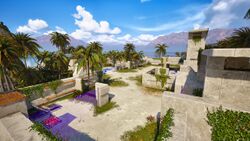
The Helping Hand: Difference between revisions
Appearance
RichouHunter (talk | contribs) Added overview image |
RichouHunter (talk | contribs) →Solution: Added solution |
||
| Line 8: | Line 8: | ||
== Puzzle Elements == | == Puzzle Elements == | ||
{{Puzzle Element List}} | {{Puzzle Element List|Blue door=true|Clone=true|Connector=true|Fan=true|Hexahedron=true|Pressure plate=true|Purple barrier=true|Receiver=true}} | ||
== Overview == | == Overview == | ||
| Line 15: | Line 15: | ||
== Solution == | == Solution == | ||
{{Spoiler|2=solution| | |||
<gallery mode="slideshow"> | |||
File:Blessed Blue - Lost - 1.jpg|Take control of the [[Clone]] inside the cell. | |||
File:Blessed Blue - Lost - 2.jpg|Position the [[Clone]] on the [[Pressure plate]] and take control of [[Yaqut]]. | |||
File:Blessed Blue - Lost - 3.jpg|Take the [[Fan]] blades and swap them for the [[Clone]] on the [[Pressure plate]]. | |||
File:Blessed Blue - Lost - 4.jpg|Walk on top of the [[Pressure plate]] where the [[Connector]] is and take control of the [[Clone]]. With the clone, take the connector and jump on the [[Fan]]. | |||
File:Blessed Blue - Lost - 5.jpg|Use the [[Connector]] to link the blue [[Emitter]] to both blue [[Receiver|Receivers]]. | |||
File:Blessed Blue - Lost - 6.jpg|Take the [[Hexahedron]] and swap it for the [[Fan]] on the [[Pressure plate]]. | |||
File:Blessed Blue - Lost - 7.jpg|Place the [[Fan]] back in place, jump on it and onto the high platform. | |||
File:Blessed Blue - Lost - 8.jpg|From the high platform, take control of [[Yaqut]] below. | |||
File:Blessed Blue - Lost - 9.jpg|Take the [[Fan]] blades and swap them for the [[Hexahedron]] on the [[Pressure plate]]. | |||
File:Blessed Blue - Lost - 10.jpg|Place the [[Hexahedron]] next to the platform, grab the [[Connector]] and jump on the Hexahedron. From this position, take control of the [[Clone]]. | |||
File:Blessed Blue - Lost - 11.jpg|Take the [[Connector]] from [[Yaqut]] and connect the blue [[Emitter]] to the blue [[Receiver]] by the [[Blue door]]. Take control of [[Yaqut]] again. | |||
File:Blessed Blue - Lost - 12.jpg|Swap the [[Hexahedron]] for the [[Fan]] on the [[Pressure plate]]. | |||
File:Blessed Blue - Lost - 13.jpg|Place the [[Fan]] blades on the Fan by the red [[Receiver]]. | |||
File:Blessed Blue - Lost - 14.jpg|Walk in front of the [[Fan]] and take control of the [[Clone]]. | |||
File:Blessed Blue - Lost - 15.jpg|[[Connector|Connect]] the red [[Emitter]] to the red [[Receiver]] to send [[Yaqut]] flying towards the [[Progress Wheel]]. | |||
File:Blessed Blue - Lost - 16.jpg|Take control of [[Yaqut]] and finish the puzzle. | |||
</gallery> | |||
}} | |||
[[Category:TTP2 Isle of the Blessed Puzzles]] | [[Category:TTP2 Isle of the Blessed Puzzles]] | ||
[[Category:TTP2 Isle of the Blessed]] | [[Category:TTP2 Isle of the Blessed]] | ||
[[Category:Puzzles]] | [[Category:Puzzles]] | ||
Latest revision as of 17:26, 20 December 2024
| The Helping Hand | |
|---|---|

| |
| Identifier: | Blue-Δ |
| Area: | Isle of the Blessed |
| Puzzle Type: | Lost |
| Previous Puzzle: | The High Road |
| Next Puzzle: | None |
The Helping Hand is the lost puzzle in the blue section of the Isle of the Blessed.
Puzzle Elements
Overview
Hints
Solution
[ solution ]


