The Prisoner: Difference between revisions
Appearance
Created page with "{{Infobox TTP2 Puzzle |identifier=Green-Gold |area=Isle of the Blessed |puzzletype=Gold }} '''The Prisoner''' is the gold puzzle in the green section of the Isle of the Blessed. == Puzzle Elements == {{Puzzle Element List}} == Overview == == Hints == == Solution == Category:TTP2 Isle of the Blessed Puzzles Category:TTP2 Isle of the Blessed Category:Puzzles" |
RichouHunter (talk | contribs) →Solution: Added solution |
||
| (One intermediate revision by the same user not shown) | |||
| Line 3: | Line 3: | ||
|area=[[Isle of the Blessed]] | |area=[[Isle of the Blessed]] | ||
|puzzletype=[[:Category:TTP2 Isle of the Blessed Puzzles|Gold]] | |puzzletype=[[:Category:TTP2 Isle of the Blessed Puzzles|Gold]] | ||
}} | |image=The Prisoner.jpg}} | ||
'''The Prisoner''' is the gold puzzle in the green section of the [[Isle of the Blessed]]. | '''The Prisoner''' is the gold puzzle in the green section of the [[Isle of the Blessed]]. It only becomes available after completing the [[Hexahedron (puzzle)|Hexahedron]]. | ||
== Puzzle Elements == | == Puzzle Elements == | ||
{{Puzzle Element List}} | {{Puzzle Element List|Blue door=true|Clone=true|Connector=true|Driller=true|Inverter=true|Jammer=true|Receiver=true}} | ||
== Overview == | == Overview == | ||
| Line 14: | Line 14: | ||
== Solution == | == Solution == | ||
{{Spoiler|2=solution| | |||
<gallery mode="slideshow"> | |||
File:Blessed Green - Gold - 1.jpg|Take the [[Connector]] and link the red [[Emitter]] to the red [[Receiver]]. | |||
File:Blessed Green - Gold - 2.jpg|[[Driller|Drill]] the bronze wall where the [[Inverter]] is. | |||
File:Blessed Green - Gold - 3.jpg|Add the [[Inverter]] to the [[Connector]]'s targets. | |||
File:Blessed Green - Gold - 4.jpg|Place the [[Inverter]] through the hole, and keep it connected to be able to leave the cell. | |||
File:Blessed Green - Gold - 5.jpg|Remove the [[Connector]]. Instead, use the [[Inverter]] to link the blue [[Emitter]] to the red [[Receiver]]. Place it down opposite the [[Driller]] hole. | |||
File:Blessed Green - Gold - 6.jpg|Bring the [[Connector]] inside of the second area and link the [[Inverter]] to the red [[Receiver]] by the [[Jammer]] through the hole and windows. | |||
File:Blessed Green - Gold - 7.jpg|Walk inside the cell, and use the [[Jammer]] to open the [[Blue door]] where the [[Clone]] is and take control of it from afar. | |||
File:Blessed Green - Gold - 8.jpg|Move the [[Inverter]] and place it down further away from the [[Emitter|Emitters]], almost against the wall. | |||
File:Blessed Green - Gold - 9.jpg|Take the [[Connector]], and link the [[Inverter]] to the red [[Receiver]] by the [[Progress Wheel]], through the [[Driller]] hole. | |||
File:Blessed Green - Gold - 10.jpg|Take control of the imprisoned [[Clone]]. | |||
File:Blessed Green - Gold - 11.jpg|Use the [[Jammer]] to open the [[Blue door]] blocking the red laser. Take control of the other [[Clone]] and finish the puzzle. | |||
</gallery> | |||
}} | |||
[[Category:TTP2 Isle of the Blessed Puzzles]] | [[Category:TTP2 Isle of the Blessed Puzzles]] | ||
[[Category:TTP2 Isle of the Blessed]] | [[Category:TTP2 Isle of the Blessed]] | ||
[[Category:Puzzles]] | [[Category:Puzzles]] | ||
Latest revision as of 10:21, 23 December 2024
| The Prisoner | |
|---|---|

| |
| Identifier: | Green-Gold |
| Area: | Isle of the Blessed |
| Puzzle Type: | Gold |
| Previous Puzzle: | None |
| Next Puzzle: | None |
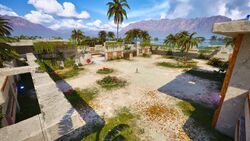
The Prisoner is the gold puzzle in the green section of the Isle of the Blessed. It only becomes available after completing the Hexahedron.
Puzzle Elements
Overview
Hints
Solution
[ solution ]


