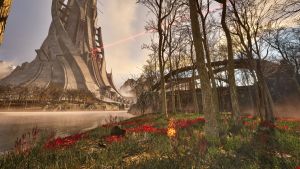
A river valley gradually drowned by the encroaching sea.
{{Infobox Area
[[File:Westerndelta.png|thumb|Western Delta]]
|shortname = West 1
The brackish water is a unique ecosystem with many endemic species.
|areatype = Regular
|previous = [[Megastructure Interior - South]]
|next = [[Anthropic Hills]]
}}The '''Western Delta''', also commonly known as '''West 1''', is the tenth regular puzzle area that the player visits.[[File:Westerndelta.png|thumb|The Western Delta tower]]
[[File:Western Delta (West 1).png|thumb|Detailed map of the area]]
[[File:West-1.jpg|thumb|An aerial view of the area]]
[[File:West-1.jpg|thumb|An aerial view of the area]]
This area is described as a river valley gradually drowned by the encroaching sea. The brackish water is a unique ecosystem with many endemic species.
== Puzzles ==
=== Main Puzzles ===
# [[Servitor]]
# [[Supportive Apparatus]]
# [[Automatic Doors]]
# [[Surfing]]
# [[Nuisance]]
# [[Elements]]
# [[Breach]]
# [[Transference]]
=== Lost Puzzles ===
* [[Jailbreak]]
* [[Vertical Locomotion]]
=== Gold Puzzle ===
* [[The Mule]]
== Lost Lab ==
The lost laboratory is located behind the Prometheus monument, to the right of [[Surfing|Puzzle 4]].
[[File:West 1 Lab Entrance.jpg|none|thumb|The entrance to the lost lab.]]
[[File:W1LostLabDisplay.jpg|none|thumb|Lost lab - Projection of a gravity well.]]
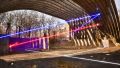
== Tetromino bridge ==
The Western Delta features a single 8-piece Tetromino Bridge. It starts off enclosed between walls, and the second part opens up, allowing the bridge to cross the river below.
The monument is located between [[Automatic Doors|Puzzle 3]] and [[Surfing|Puzzle 4]].
'''Sprite route'''
{{Spoiler|
<gallery mode="slideshow">
File:w1-sprite-location-01.jpg|Location 1: Inside [[Elements|Puzzle 6]], in the ceiling. See [[Elements|puzzle page]] if you need a hint on how to reach the sprite.
File:w1-sprite-location-02.jpg|Location 2: Just outside [[Elements|Puzzle 6]].
File:w1-sprite-location-03.jpg|Location 3: Between [[Nuisance|Puzzle 5]] and [[Elements|Puzzle 6]], next to a data terminal.
File:w1-sprite-location-04.jpg|Location 4: On the rails of the rapid transport system. See next picture for how to reach this.
File:w1-sprite-location-04a.jpg|How to reach Location 4: Climb on to the rails here. Walk and jump, don't sprint.
File:w1-sprite-location-05.jpg|Location 5: Just outside the Prometheus monument.
</gallery>
|route}}
'''Quote'''
{{Quote|You must yearn for a better world, yearn for it with such intensity that your heart suffers; keep your eyes on
that distant vision even when you know that you may never reach it.|Prometheus}}
=== Sphinx monument ===
[[File:West 1 - Sphinx Star.jpg|thumb|The clue shown on the Sphinx monument.]]
'''Solution'''
{{Spoiler
|Go behind puzzle 6, you will find a set of stone pillars on the ground. Push the ones indicated by the clue to activate the monument
[[File:W1-sphinx-monument-pillars.jpg|left|thumb|Location of the pillars. Puzzle 6 can be seen in the distance]]
|solution}}
'''Quote'''
{{Quote|None may know what came first, error or sin; and yet every choice depends on it.|Sphinx}}
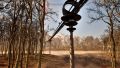
== Prometheus Sparks ==
{{Spoiler|The first spark is located behind the golden puzzle, at the very tip of the landmass, close to the edge of the water.
[[File:W1-prometheus-spark-1.jpg|left|thumb|the building in front is the golden puzzle structure]]
The lost laboratory is located behind the Prometheus monument, to the right of Puzzle 4.
The entrance to the lost lab.Lost lab - Projection of a gravity well.
Tetromino bridge
The Western Delta features a single 8-piece Tetromino Bridge. It starts off enclosed between walls, and the second part opens up, allowing the bridge to cross the river below.
Location 3: Between Puzzle 5 and Puzzle 6, next to a data terminal.
Location 4: On the rails of the rapid transport system. See next picture for how to reach this.
How to reach Location 4: Climb on to the rails here. Walk and jump, don't sprint.
Location 5: Just outside the Prometheus monument.
Quote
You must yearn for a better world, yearn for it with such intensity that your heart suffers; keep your eyes on
that distant vision even when you know that you may never reach it.
—Prometheus
Sphinx monument
The clue shown on the Sphinx monument.
Solution
[ solution ]
Go behind puzzle 6, you will find a set of stone pillars on the ground. Push the ones indicated by the clue to activate the monument
Location of the pillars. Puzzle 6 can be seen in the distance
Quote
None may know what came first, error or sin; and yet every choice depends on it.
—Sphinx
Prometheus Sparks
[ location of the first Prometheus Spark ]
The first spark is located behind the golden puzzle, at the very tip of the landmass, close to the edge of the water.
the building in front is the golden puzzle structure

.png)


.jpg)
 Location 1: Inside Puzzle 6, in the ceiling. See puzzle page if you need a hint on how to reach the sprite.
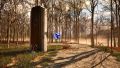 Location 2: Just outside Puzzle 6.
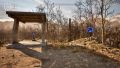
 Location 4: On the rails of the rapid transport system. See next picture for how to reach this.
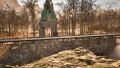 How to reach Location 4: Climb on to the rails here. Walk and jump, don't sprint.
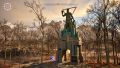 Location 5: Just outside the Prometheus monument.